Showing posts with label finished quilt. Show all posts

Friday, June 9, 2017

The Seaweed Is Always Greener...

...in somebody else's lake. This quilt was so incredibly fun to make. Maybe it was the fun, asymmetric design that I'm not used to. Maybe it was the beautiful shot cottons I used to make this quilt. Or maybe it's just fun to quilt. I'm going with all of the above! Introducing "The Seaweed Is Always Greener" quilt.

I had a ton of fun making this quilt. I've always struggled with the mustard color seen in this quilt, so it's always a personal challenge to use it. I love the look of it in a lot of quilts, but I'm just not as into earth tones as I am jewel tones. At the same time, I am always in love with the quilts I make that use colors out of my comfort zone.

And like most of my quilts, this one was paper pieced. I designed it when playing with a parallelogram design and just adding in random lines. Sometimes freeform designing yields some of the best results, as is the case with this quilt. Because I used shot cottons, I made sure to really starch them first before piecing with them, as it's not good to use any form of liquid with the paper template.

As for the quilting, I matchstick quilted this using my HandiQuilter longarm. I used channel locks and took my time carefully avoiding quilting anything in the mustard yellow. I did that so the fabric would pop. I only used one layer of batting, but the 3-D effect still comes through loud and strong. I love the look of matchstick quilting. It sure uses up a ton of thread, but it's so worth it. In the end, I'm so in love with this quilt.

This quilt measures 33.5" x 44" and is available as a pattern in my Craftsy shop. 

Monday, June 5, 2017

Nesting - What's Old is New Again

Wow, I'm not sure I ever thought I'd finish this quilt. I made the top what seems like ages ago, but was really about 5-6 years ago. I used some very precious Tula Pink Nest fabric (3 charm squares) to make the top, which is a modified version of a Weeks Ringle/Bill Kerr pattern that I thought would be good to showcase the charm packs and the fabric without having to cut into them. 

I ended up just quilting straight lines across the quilt about 1/2" to 3/4" apart. I didn't measure how far apart the lines were; I just went for it. I think the reason it took me so long to quilt and finish this quilt is that I had intentions of custom machine quilting it, but I could never get inspired by a particular design(s) to dive in. So it sat unfinished. Until I decided to just put the quilt on my longarm and go for it. 

My plan is to use this quilt as a beach blanket. Some of you might be gasping right now at the fact that I'm planning on using such rare, precious Tula Pink fabric on the beach, but I decided I'm going to use and love this quilt. I put a dark print from the collection on the back that I got on clearance for about $3 a yard when the line was out at the time. 

The quilt is slightly smaller than a twin size, but it's perfect for lying out at the beach and reading a good book. I bound the quilt in the same Nest fabric as the back since I had so much yardage of it. One of the reasons I'm excited to use this quilt is that it really shows how my style has changed through the years. I love that about myself. If I was still making the same type of quilts as I was five years ago, I'm not sure I'd be quilting. I love evolving my style and trying new things. That's the joy of quilting to me. 

Monday, October 17, 2016

Dancing At Dusk

I'm constantly doodling and coming up with new quilt designs. Lately, a lot of them have been a little more complex. Throw in my desire to do some more custom machine quilting and I've found myself with a lot of in-progress quilts that I'm spending a lot of time finishing. Don't get me wrong, I love those projects, but sometimes there's something satisfying about finishing something in a short period of time.


Introducing Dancing At Dusk, my latest quilt and newest pattern. This, like most of my quilts is a paper pieced quilt that is super easy to make. I made each block in probably an hour, making it the perfect after-work project. I could make one block a night and then I added the outer fabric to make the stars stand out. Bam... a finished quilt top in a week. But like most projects of mine, I sit on them for a little while as I contemplate quilting options. I eventually quilted this by drawing a square in the center and continuously echoing around the square out to the edge using some 50wt Aurifil thread.

As I was designing this, I fell in love with the colors that I mocked up in my design program and just HAD to use the same colors. Fortunately for me, I have an extensive stash of Michael Miller Cotton Couture solids and had enough (1/2 yard) of each color and a couple yards of the fog on hand to get started immediately on this.

I absolutely love the movement that the blocks create. It's amazing what happens when you simply twist a block slightly. It just goes to show you that if you play with your designs, great things can happen.

The batting is a piece of Warm and Natural that was left over from another project. It finishes at 36" x 36" square.

The pattern is now available in my Craftsy shop. If you make one, I'd love to see a picture of it. 

Monday, August 15, 2016

Filled With Love

This quilt has been a long time in the making. I began this sometime in the summer of 2014, while I was in graduate school, so my quilting was limited at that time. I finished the top last spring (spring 2015) and it sat around for a while as I contemplated how to quilt it. I was in love with the quilt top and wanted to make sure the quilting was just as awesome.


After sitting around for a while, I threw the quilt on my longarm and just went for it. As Angela Walters says, "finished is better than perfect." The quilting isn't perfect, but I just love it. I definitely need to practice my stitch in the ditch skills, but I know that will get better with time.
I started quilting the white background first and then moved onto the gray diamonds followed by the colorful stars last. I didn't know what I was going to do, but each step of the way, with the desire to get the quilt finished, I just picked something and went with it.

The best thing? I don't regret any of my quilting designs and can't pick a favorite. People often ask me how I pick a quilting design, and I always let people know that my goal is always to pick a quilting motif that compliments the quilt top. Every quilting decision should be intentional.

The pattern I used for this quilt is my free Prism Dust quilt block pattern. I used primarily Michael Miller Cotton Couture with a couple of Art Gallery Pure Elements mixed in. The thread is So Fine #50, and yes I changed thread for each gray and each colored star. The batting is Quilters Dream Cotton Select. 

Friday, January 22, 2016

Dazzling Diamonds Remix

Three years ago now I taught a class for my Dazzling Diamonds quilt pattern. Instead of making it on solids like my original pattern, I made this one in some prints to go with the colors of my guest bedroom.
I'm really not sure why it took me this long to finish this quilt, because I really do love it. This is still one of my favorite quilt patterns I've designed over the years. I love that there are so many different layout options for this quilt, making it so versatile.
This quilt finishes at 24" square and is now hanging in my guest bedroom. I picked these colors specifically for this bedroom, with it's blue walls and pink and green accents.
I machine quilted this on my longarm and found inspiration from a recent Craftsy class - Angela Walters' Dot to Dot quilting. I had quilted the white and blue already before that class but decided to use one of her quilting techniques to do the green points here. I really love how it came out and will definitely use this design again. I had toyed with pebbling the pink, but it became clear that with the pattern, it would be difficult for any pattern to show up, so I just echoed around the diamonds.
I'm not sure if this new quilt will become a favorite over the original, but they're both pretty awesome in my opinion. I can look back at this original all the time and just smile.

If you ever come stay with me at my house, your guest room will now how two lovely quilts hanging in it. You can see my Twirling Trellis quilt hanging in the mirror here with some great complementary colors to it. 

Monday, December 7, 2015

Every Which Way

I love a good challenge to push me beyond my comfort zone as a way to try new things. Sometimes I'm less than enthusiastic about a challenge, but I forge ahead anyway as a way to try something new and maybe experiment with something I otherwise wouldn't have. That way, if it doesn't come out the way I want, I can just blame the challenge. 

I loved attending the inaugural QuiltCon in Austin a few years back and I was super bummed that I had class the weekend of QuiltCon this year. That's why when I knew I could attend QuiltCon Pasadena in 2016, I booked immediately. I've been lucky enough to have quilts hanging in both shows to date, but with school, I haven't exactly had as much time to quilt these past few years. That meant I had a lack of quilts to submit to QuiltCon. That in and of itself was enough motivation to enter the Michael Miller QuiltCon challenge this year. 


I will admit, at first the metallic dot fabrics did absolutely nothing for me. I've never really been one to use fabric with dots or metallics, so combining them wasn't exactly motivating for me. At the same time, I had been toying with the idea of framing up flying geese blocks and combining them in some way. 


Originally I thought about stacking the geese at the bottom of the quilt and arranging them in various heights. Because I made as many geese as I could with the fat eighths provided, I had a ton of geese that allowed me to play with different layouts. One night as I was getting ready for bed, about two nights after I finished all of the geese, which are paper pieced of course, I thought about doing a design where the geese were in the center of the quilt and they radiated out from the center. After playing around a little, this design is what I came up with. 


I love Cotton Couture solids, so it was a pleasure working with them with this quilt. I pulled a mint solid from my stash that I have been obsessed over to use as the background. Since I was going out of my comfort zone, I figured I'd pull a different color palette for me. I pulled some solids including mango, periwinkle, watermelon and apricot to go with the mint. Normally I wouldn't pair these colors together, but hey, this is a challenge after all. 


And of course, because I can't do anything easy, I decided to matchstick quilt this bad boy ONE WEEK before the deadline to submit this to QuiltCon. Smart, huh? Fortunately my guide locks came in for my longarm and I was able to matchstick quilt this using a light green thread, which matched the mint fabric better than the mint thread I had (go figure). I quilted it in one day during a marathon seven hour quilting session while watching some football. Let's just say my back was killing me after I was done, but many it was so worth it. 

I bound it with the same mint solid fabric because I wanted the flying geese to be the focal point. I didn't want the binding to be distracting. 

One of the things I love about this quilt and the quilting on it is how the matchstick quilting toned down the harshness of the black fabric and really helped blend it all together. I'm really happy with how this quilt came out and while I'm excited to do more matchstick quilting in the future with my new channel locks, I'm not about to do a marathon quilting session again any time soon. 

Quilt Stats:
Size: 50" x 50"
Fabrics: Michael Miller Glitz and Cotton Couture
Thread: Pieced with Aurifil 50wt 2024 and quilted with Super Threads So Fine! 50wt Barely Green (9 bobbin's worth!)
Batting: Quilter's Dream Orient

Thursday, October 29, 2015

Milky Way Quilt

Several months ago the folks over at Michael Miller reached out to me and asked me to help participate in a 100 Quilt Block project in conjunction with Janome. The block needed to be six inches square and use the provided Cotton Couture solids from Michael Miller. I'm a huge fan of Cotton Couture, as I find the hand feel of those solids the best in the industry (along with Art Gallery's solids). So of course, I set to work designing a fun paper pieced block.


I had fun making this block and decided to make a larger quilt out of it. I took the remaining solids that were in the bundle Michael Miller provided and enlarged the block to 12" square and made the following quilt with it. (Excuse the less than stellar photos, with it getting dark so early these days, it's hard to get a good photo right now.)


This was the first time I used a cream-colored binding to blend in with the vanilla background I used to offset the four quilt blocks. I'm slightly worried that it will get dirty easier, but I'm willing to take that chance.


Here's a closeup of the quilting. I used an Auriful 50 weight thread in Chalk (#2026) to quilt this on my domestic machine. I did most of the quilting on an diagonal parallel to one of the star points, but changing direction about three quarters of the way through to add some dimension and twist to the quilting.

To download the pattern for free and see the rest of the blocks, visit the Janome site.

This quilt measures 30" square, so I'm entering it into the small quilt category in the Blogger's Quilt Festival

Monday, September 8, 2014

Baby Quilt - Finally a Finish!

Holy Cow! Has it really been more than three months since my last blog post? I guess that's what happens when you mix work, grad school and summer together. I admit, I haven't had the time to do much sewing, but I did manage to get this quilt finished back in June to give to my wonderful cousin before she had her adorable son.
I got a lot of the piecing done at retreat back in March and slowly finished piecing the quilt together and quilted it, echoing around the tumbler blocks in the months after.
I cut the tumbler pieces out using four charm packs and my tumbler die for my AccuQuilt using some Pure charm packs I had lying around.

It was a big accomplishment to get this one done in time for the baby shower. The final stitch went into the binding the morning of! My other cousin is having a baby in December, so I guess I should get moving on that one. Actually, I might turn my Michael Miller challenge quilt into that baby quilt since I'm still working on that. 

Friday, January 10, 2014

Confetti

Over the Christmas break I managed to finish my Simply Solids Bee quilt. The quilting took a while, as I'm sure you can guess by looking at it.

Every 1/4" of this quilt has been quilted. This was only my second time doing ruler work on a quilt and am quite proud of how I did even though it's not perfect.

I sketched out how I envisioned the quilting to go and improvised as I went. I wanted a shattered, broken piece of glass look to the sections of straight line quilting. Each section was framed out first and filled in with straight lines roughly 1/4" apart.

I have to say, I'm really in love with this quilt. I think because it's so different for me. While I have done a number of improv quilts before, this one might be my favorite.

I tried to sneak outside this week and grab a few pictures of it with some natural light and barely got a few pictures before I began to freeze my butt off, so this is what I got for now.

I even made a scrappy binding with some of the random white/cream scraps and a few of the lime, pomegranate and navy fabrics. I never piece my binding with straight seams, I always piece them on the bias. It makes it easier to hand sew it to the back. But for this quilt, it just called for more straight lines instead of all of the angles. Let's just say that I won't be doing that again any time soon.


Quilt Stats:
51" x 50"
Fabrics: assorted solids
Thread: assorting for piecing (since it was a bee) and So Fine #50 - Pearl for machine quilting
Batting: Two layers of Quilter's Dream Orient

Monday, December 9, 2013

American Quilter - Dream Diamonds

I'm excited to share a quilt with you that I finished earlier this year and is currently featured in the latest issue of American Quilter Magazine.

I designed this paper pieced quilt last year and finished piecing the top earlier this year.


This quilt was also quilted by the talented Angela Walters. She did an amazing job with the quilting.


If you're new to paper piecing, this is a very simple pattern to try. The 12" blocks are made of up four sections, each with only five pieces each. You also don't need to line up any points when assembling each block, although you do need to line up a few when sewing multiple blocks together.


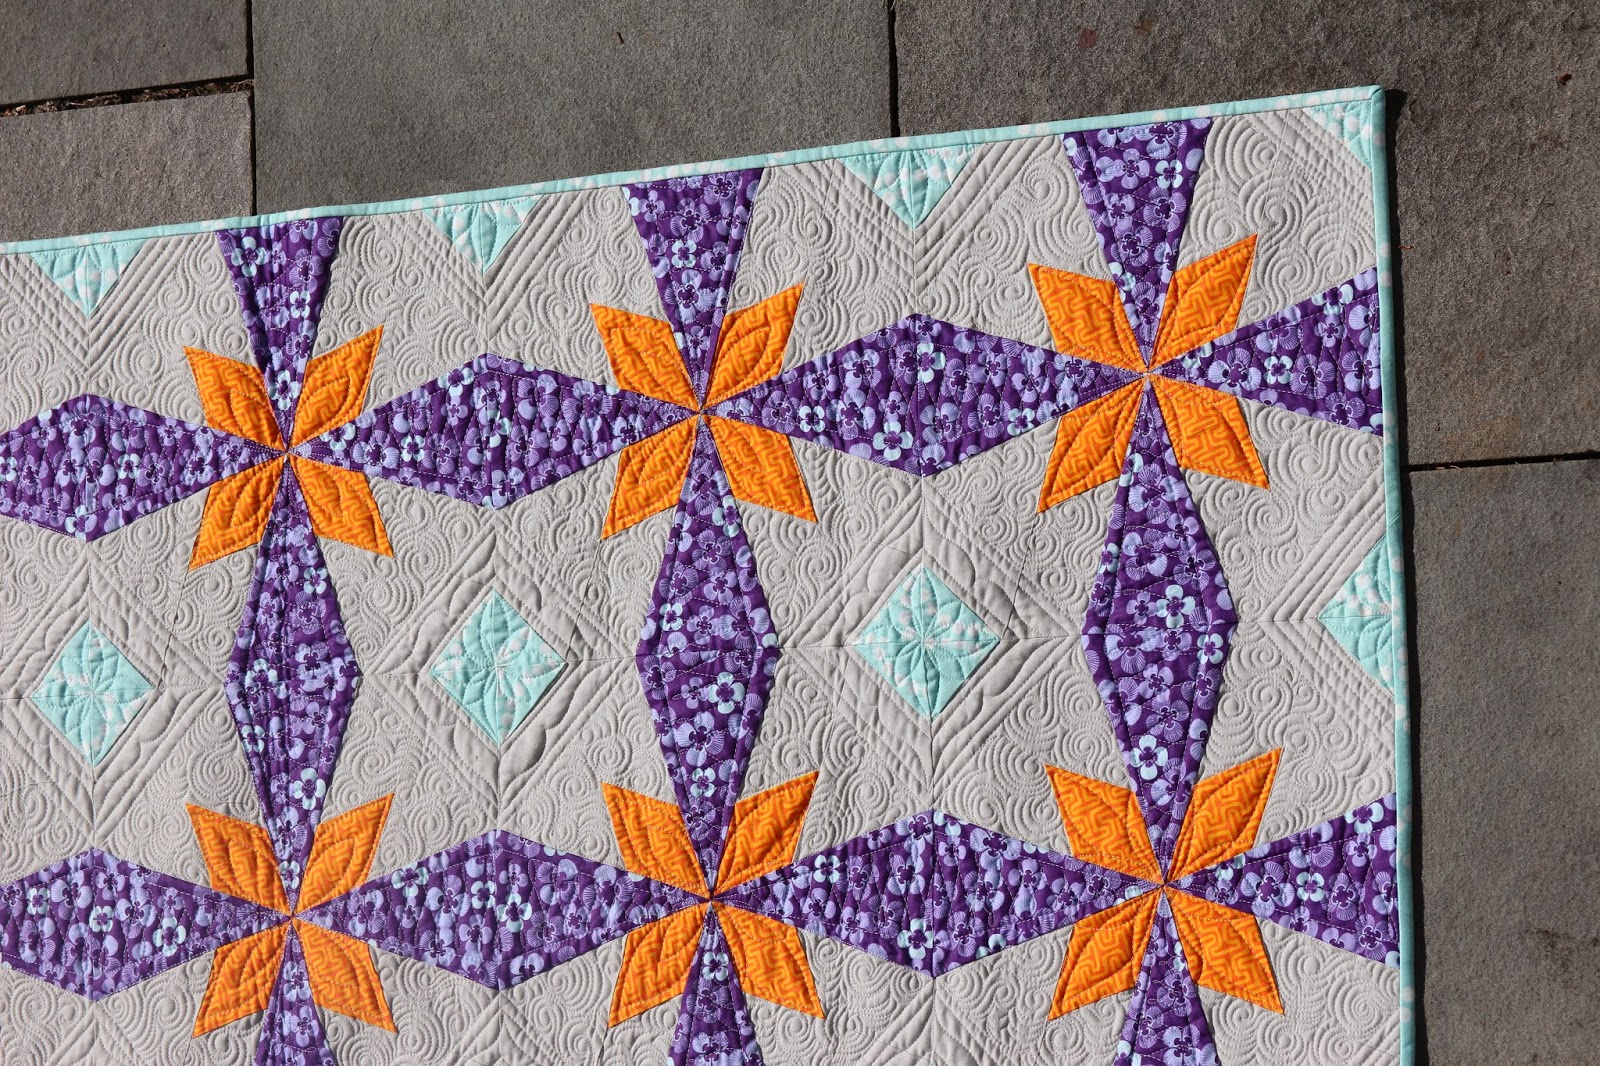
I try and challenge myself at times, trying to go out of my comfort zone when it comes to colors at times. While I love purple and blue, orange is my least favorite color, so this quilt was a personal challenge to use more orange.


I took these pictures at my parent's house, right as they were moving out and into their new home, so this magazine and these photos will always be a reminder of the eight years they spent there.


Friday, July 5, 2013

Criss Cross Quilt

Last weekend I was rushing to finish this quilt so I could enter it in Quilter's Way's color challenge for the month of June.  
The pattern layout was a bit different than how I finished this quilt. I decide to pair the fabrics from the challenge bundle and create six blocks. The original pattern was much more random, but I wanted to make it a bit more structured. 

The pattern was pretty easy to construct. Just a bunch of squares and triangles. 

I machine quilted this on the longarm using an all over square and straight line meander. 

You can really see the texture in this shot, which I love. 

I decided to bind this quilt in Kona Lipstick. I wanted a different color for the binding and thought a nice, bright red would be the perfect compliment to the rest of the colors. 


I used Robert Kaufman Quilter's Linen in Steel for the backing, which blends nicely with the So Fine! gray thread that I used for the quilting. 


This quilt finishes at 48" x 72"and was made using a solid fat quarter bundle pulled by Quilter's Way and an RJR solid for the background.

Friday, June 21, 2013

A Finish LONG in the Making

Well, I finally did it. I finished one of my oldest UFO's!
I started this quilt more than eight years ago. I took an introductory class on paper piecing and made one of the blocks in this quilt. The colors of the block were inspired by the border fabric.
In the class, we made just one block, but I fell in love with paper piecing and just had to make another eight blocks to make this quilt.
What got me motivated to finish this quilt? My new longarm! This quilt top had been sitting in the closet of my studio for years. When I got the longarm, I wanted to try some quilting on an actual quilt, not just some scrap fabric. This quilt seemed like the perfect one.
For starters, it was my first paper pieced quilt, which I've grown to love the technique. My technique wasn't the best and I can point out MANY flaws, so it felt like a good quilt to practice on. Second, while I will always like this quilt, it's not totally my style any more. I can't remember the last time I put a border on a quilt. The fabrics are more traditional than I like now too.
The only fabric I can identify now is the binding, which I just added this week - a BasicGrey Origins fabric left over from my storm at sea quilt I made recently.
I am VERY happy to have this quilt finally f